The ultimate terminal for Angular developers
A step by step guide to setup an epic terminal optimized for Angular development, with hyper, fish and oh-my-posh.

Kevin Kreuzer
@nivekcode
Dec 21, 2022
7 min read
What’s an essential tool for a developer? A proper terminal, of course.
When I refer to a proper terminal, I am not talking about an old fashion
looking terminal. I am talking about some epic stuff here. We are talking about a terminal
with enhanced usability, fancy features, and a UI optimized for Angular development.
Sounds good; let me show you how to set it up.
Terminal setup
The terminal we are going to set up consists of three layers.

A Shell, a framework, and finally, a terminal. There are various choices for each of those levels. In our case, we will use fish as a shell, oh-my-posh as a framework, and hyper as a Terminal.
The Shell
A shell is an interface to the operating system. We can use this interface to execute commands or even scripts.
The most common shells are probably zsh and bash . zsh is much more customizable than bash but they are very similar at its core. So if zsh and bash are the most common shells, why are we using fish?
fish stands for "Friendly interactive Shell". fish is highly customizable, has fantastic tab completion and the outstanding syntax highlighting makes it, at least in my opinion, the most user-friendly shell.
Installing fish 🐟
There are various ways to install software. I use a Mac and usually install all my developer software with homebrew. Throughout this tutorial, we will also use homebrew, but there are other ways to install the software.
brew install fish
That’s it. fish is installed. But we are not seeing much at this point because no terminal is yet using fish. We will fix this in a later step. But let's first take a look at oh-my-posh.
Oh my posh — the theme engine for your terminal
To let our terminal shine, we install oh-my-posh.
oh-my-posh is a custom prompt engine for any shell that has the ability to adjust the prompt string with a function or variable.
When it comes to installing oh-my-posh, again, homebrew has us covered.
brew tap jandedobbeleer/oh-my-posh
brew install oh-my-posh
Neat. We successfully installed oh-my-posh. Now it's time to install an oh-my-posh theme.
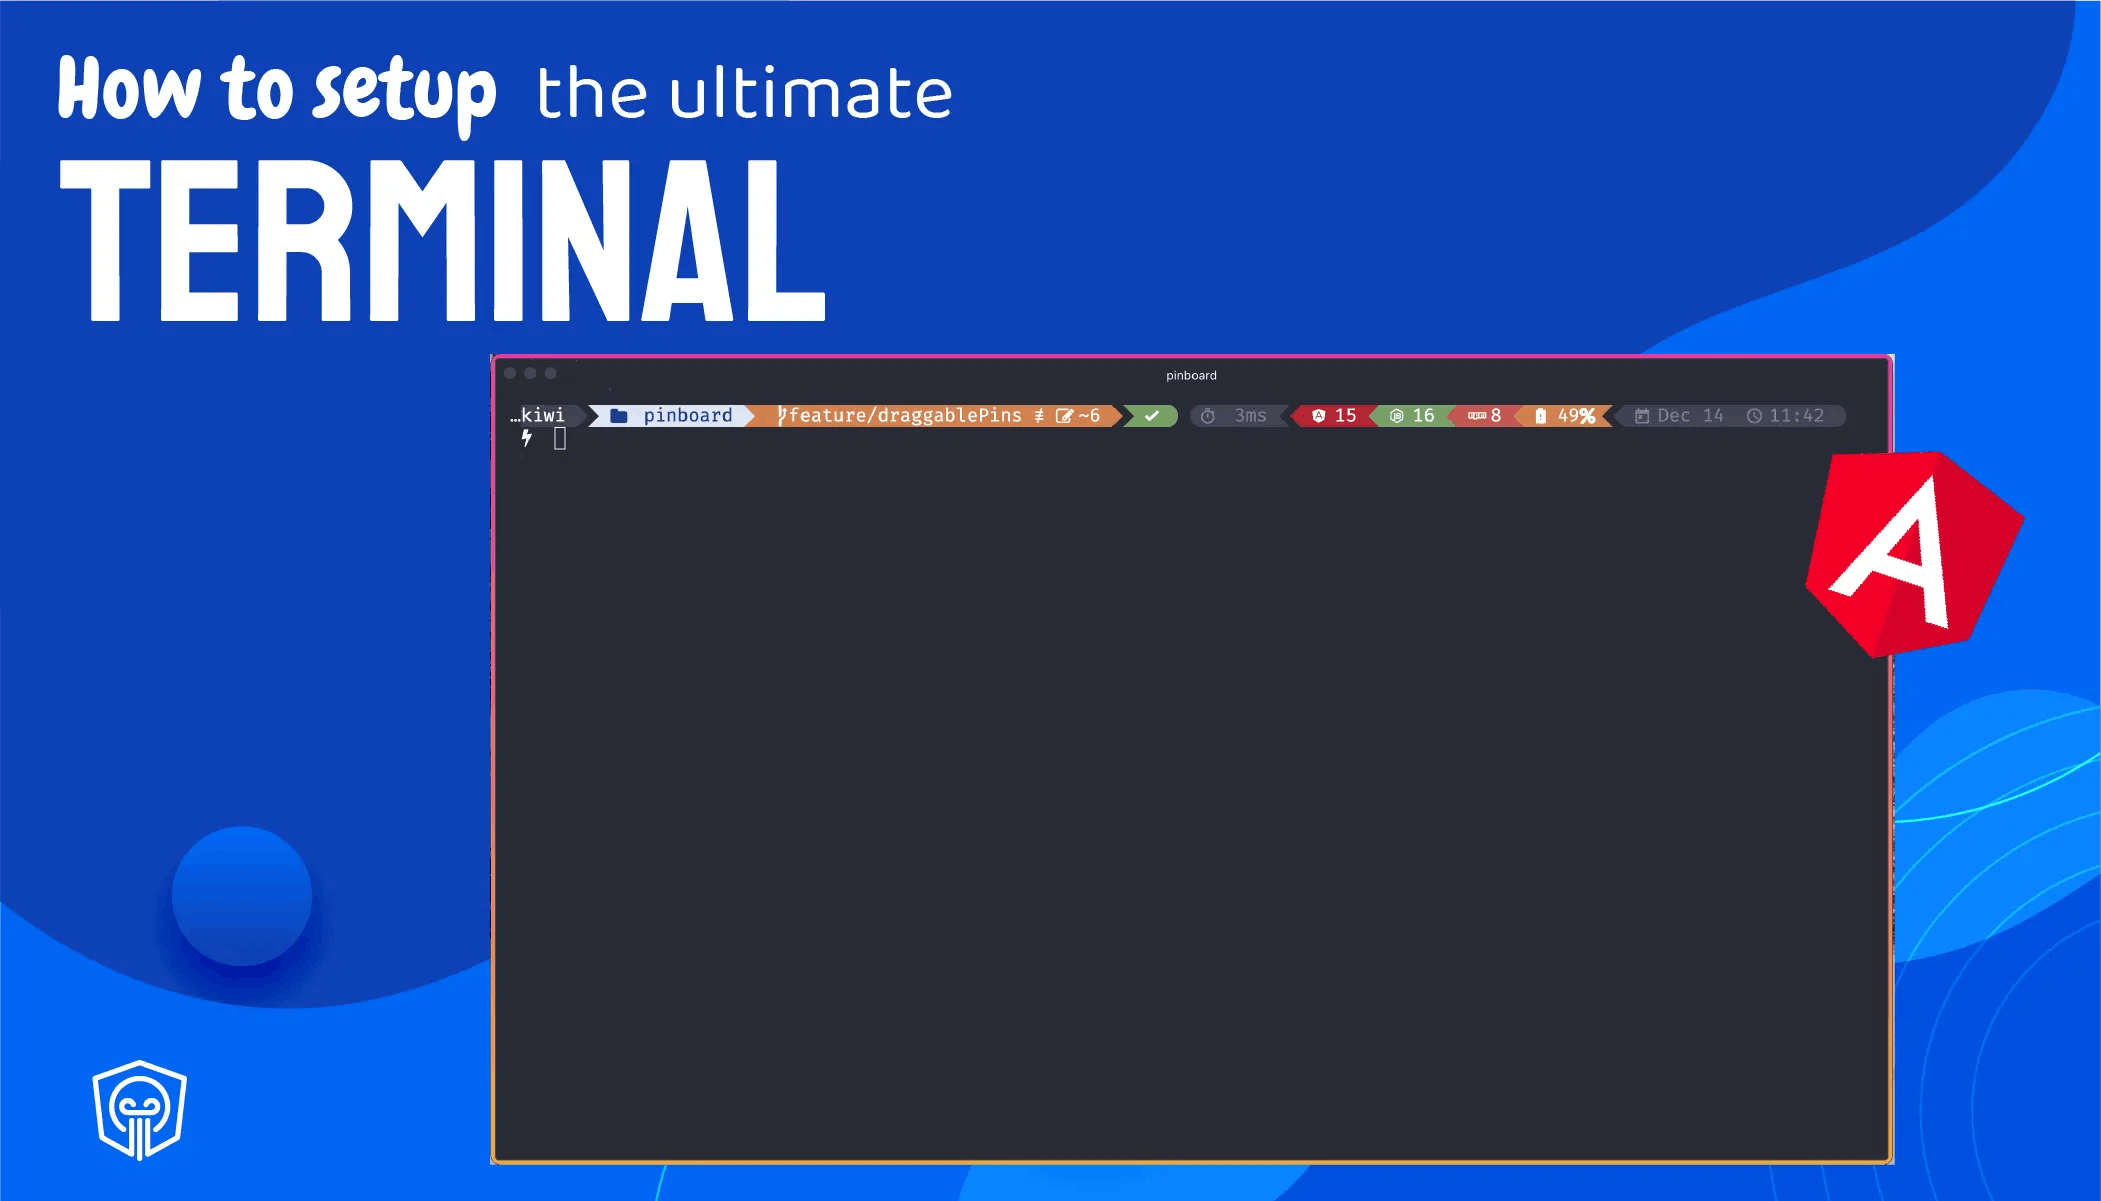
Angularic - the oh-my-posh theme for Angular developers
For the best possible looking terminal and maximum functionality we created a oh-my-posh theme name Angularic that is optimized for Angular development. (Credits to Tomas)
Angularic is a theme for Oh My Posh, a cross-shell prompt theming engine. It brings lots of infos relevant to Angular development packaged in a sleek and modern design.
The angularic theme contains the following outstanding features:
- Display of Angular version (major).
- Display of NX version (major).
- Display of Node version (major).
- Display of NPM version (major).
- Display of current User.
- Git status (behind, ahead, changes...)
- Execution status & execution time
- Date and time

Setup Angularic
For a fully functional terminal with the Angularic theme we first need to install a Nerd font.
Nerd font
To display all icons used inside the Angularic theme we need a Nerd font.
A Nerd font is a modified font that contains the original font plus additional icons (glyphs).
oh-my-posh offers a great helper to install a Nerd font. Open up a terminal and execute the following command.
oh-my-posh font install
Use the wizard to select and install your favourite Nerd font.
Download Angularic
Let's start by creating a .poshthemes folder at the system root. Inside this .poshtemes folder we create a new JSON file named angularic.omp.json and add the content from this Github Repository.
Great, we successfully setup Angularic. Let's use it.
Connect oh-my-posh, fish and Angularic
Now it’s time to connect the pieces, fish, oh-my-posh and our angularic theme. By installing fish a .config folder was created in our system root.
~/.config/fish/config.fish
Open this file with your Vim or an editor of your choice and add the content below. What, Vim?! You might say? Come on; we are setting up a terminal 😉.
if status is-interactive
    # Commands to run in interactive sessions can go here
end
fish_add_path /opt/homebrew/bin
oh-my-posh --init --shell fish --config ~/.poshthemes/angularic.omp.json | source
We execute oh-my-posh with some arguments and pass the theme we just copied as an argument.
Great! We successfully coupled fish and oh-my-posh together with our angularic theme. Let’s move on to the last part that will finally put everything together.
If you're looking to improve your Angular and JavaScript skills, be sure to follow my Twitch channel for weekly streams on the latest tips and tricks! I'll also be available to answer any questions you may have during the stream, so come join the community and let's learn together.
Hyper — the JS terminal
hyper is a terminal that is built completely on web technologies. It's a beautiful and extensible terminal. It’s highly customizable, has tons of plugins, and, well, it just looks nice.
Again, we can install hyper with homebrew.
brew install hyper
Once hyper is installed, we can open it, and…

It doesn’t look as advertised. Well yeah, we haven’t customized it yet.
Theme
The first thing to add is a theme. hyper has its own themes, but we will use the mighty Dracula theme here.

There are two ways to install this theme.
Either you can run hyper install hyper-dracula or we can add it to the config file. I prefer the config file because we will also use it for further customizations.
Assumed you have hyper opened, click in the top menu on Hyper > Preferences. This will open the .hyper.js file, which is located in your system root. In this file we will do two customizations.
First, let’s search for the fontFamily property and add make sure to list our previously installed Nerd font as the first font. Next, let's search for the plugins property and add hyper-dracula to the array.
To apply the changes, we have to click on View > Full Reload. Great, at this point, our terminal should have the nice Dracula style. But that’s not all yet.
Plugins
By applying a theme, we learned about plugins. hyper has tons of great plugins. Even though you may want to install them all, be aware that installing too many plugins also impacts performance. I personally installed the following plugins:
- Hyperpower — adds a very nice power effect with wow mode once you start typing.
- Hyperborder — adds a multicolored border to your terminal
- gitrocket — Launches a rocket once you push to a repository
- space-pull — Lands a rocket once we pull code from a repository
Installing those plugins is super easy. We have to add it to our plugins array in the .hyper.js config file.
plugins: [
  'hyperpower',
  'hyper-dracula',
  'hyperborder',
  'gitrocket',
  'space-pull',
];
If the plugins aren’t yet applied click on Tools > Update plugins.
Put everything together
Wow. At this point, our Hyper terminal looks awesome. But, guess what? It’s not yet using fish nor oh-my-posh.
We already connected fish ane oh-my-posh. And now we will also connect hyper". To do so, we again have to edit the .hyper.js config file. This time we have to update the shell property to point to our fish shell. If you installed fish with homebrew, the path looks like this:
shell: '/opt/homebrew/bin/fish'
If you don't know where fish is installed you can simply type which fish in your terminal.
That’s it. We successfully setup the ultimate terminal for Angular developers. Happy coding!

Do you enjoy the theme of the code preview? Explore our brand new theme plugin
Skol - the ultimate IDE theme

Northern lights feeling straight to your IDE. A simple but powerful dark theme that looks great and relaxes your eyes.
Build smarter UIs with Angular + AI
Angular + AI Video Course
A hands-on course showing how to integrate AI into Angular apps using Hash Brown to build intelligent, reactive UIs.
Learn streaming chat, tool calling, generative UI, structured outputs, and more — step by step.
Do you enjoy the content and want to master Angular's brand new Signal Forms?
Angular Signal Forms: Hands-On Masterclass
Master Angular's brand new Signal-Forms through 12 progressive chapters with theory and hands-on labs.
Learn form basics, validators, custom controls, subforms, migration strategies, and more!
Get notified
about new blog posts
Sign up for Angular Experts Content Updates & News and you'll get notified whenever we release a new blog posts about Angular, Ngrx, RxJs or other interesting Frontend topics!
We will never share your email with anyone else and you can unsubscribe at any time!
Responses & comments
Do not hesitate to ask questions and share your own experience and perspective with the topic
You might also like
Check out following blog posts from Angular Experts to learn even more about related topics like Angular !

Top 10 Angular Architecture Mistakes You Really Want To Avoid
In 2024, Angular keeps changing for better with ever increasing pace, but the big picture remains the same which makes architecture know-how timeless and well worth your time!

Tomas Trajan
@tomastrajan
Sep 10, 2024
15 min read

Angular Signal Inputs
Revolutionize Your Angular Components with the brand new Reactive Signal Inputs.
Kevin Kreuzer
@nivekcode
Jan 24, 2024
6 min read
Improving DX with new Angular @Input Value Transform
Embrace the Future: Moving Beyond Getters and Setters! Learn how to leverage the power of custom transformers or the build in booleanAttribute and numberAttribute transformers.
Kevin Kreuzer
@nivekcode
Nov 18, 2023
3 min read
Empower your team with our extensive experience
Angular Experts have spent many years consulting with enterprises and startups alike, leading workshops and tutorials, and maintaining rich open source resources. We take great pride in our experience in modern front-end and would be thrilled to help your business boom
